Custom Search

Sunday 6 March 2011

Knife making

This was one thing i had been looking forward to making and honestly now that it's finished i'm quite sad, seeing this knife take shape over the past month has been great and for someone who has ZERO woodworking experience any sort of experience in making things really i am extremely happy with this knife. I have shown in a previous post the actual kit so i'm going to show the process of making it. Hope you enjoy.

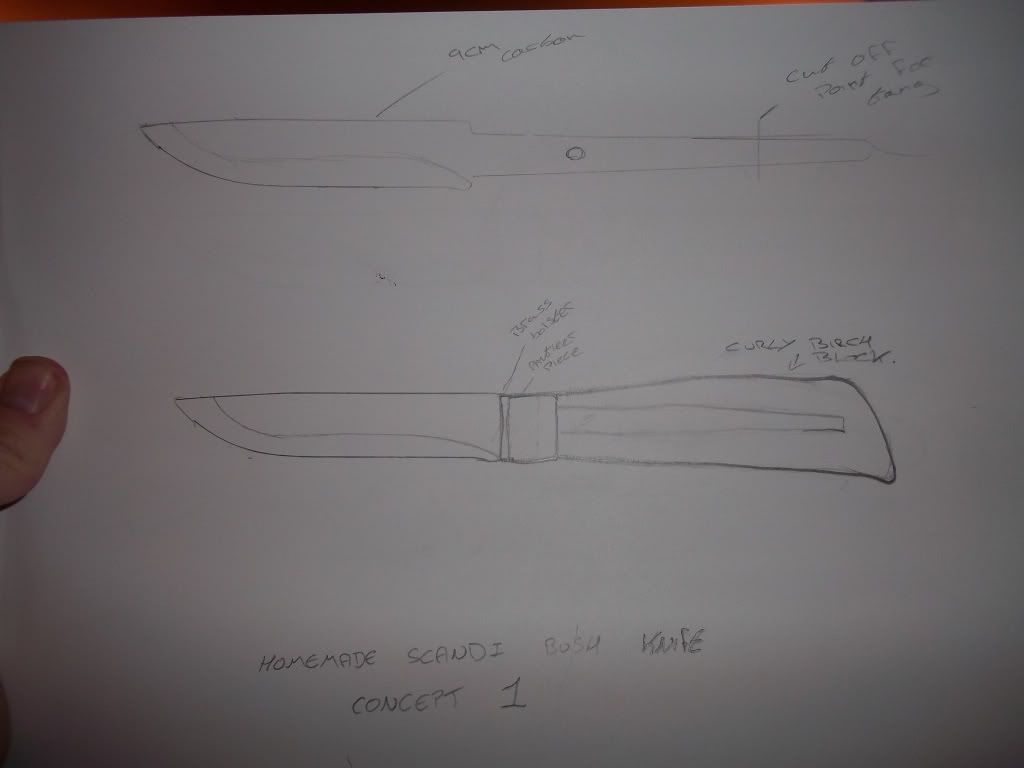
So i started with a very basic concept design. Don't worry if it doesnt turn out exactly the same as your drawing as you are going to change various things depending on numerous factors the grain, a cut to deep etc. On this drawing you will see i forgot to include the height of the antler and bolster and i didnt actually cut the tang down any but it worked as a rough shape for the handle which is all its needed for really.


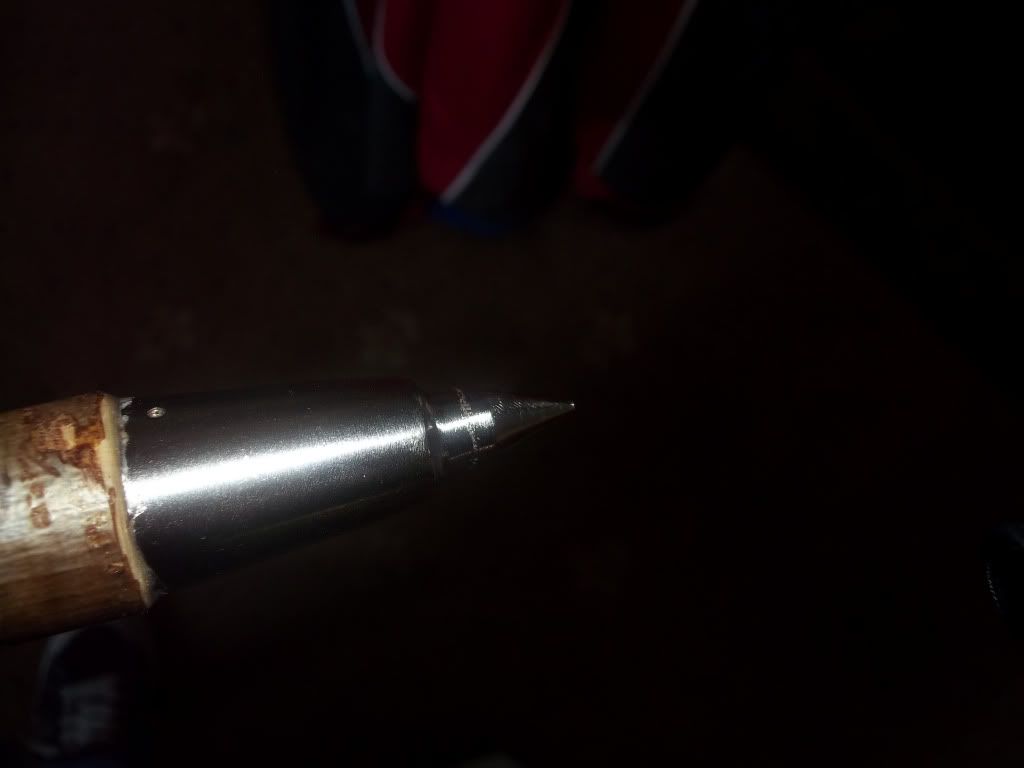
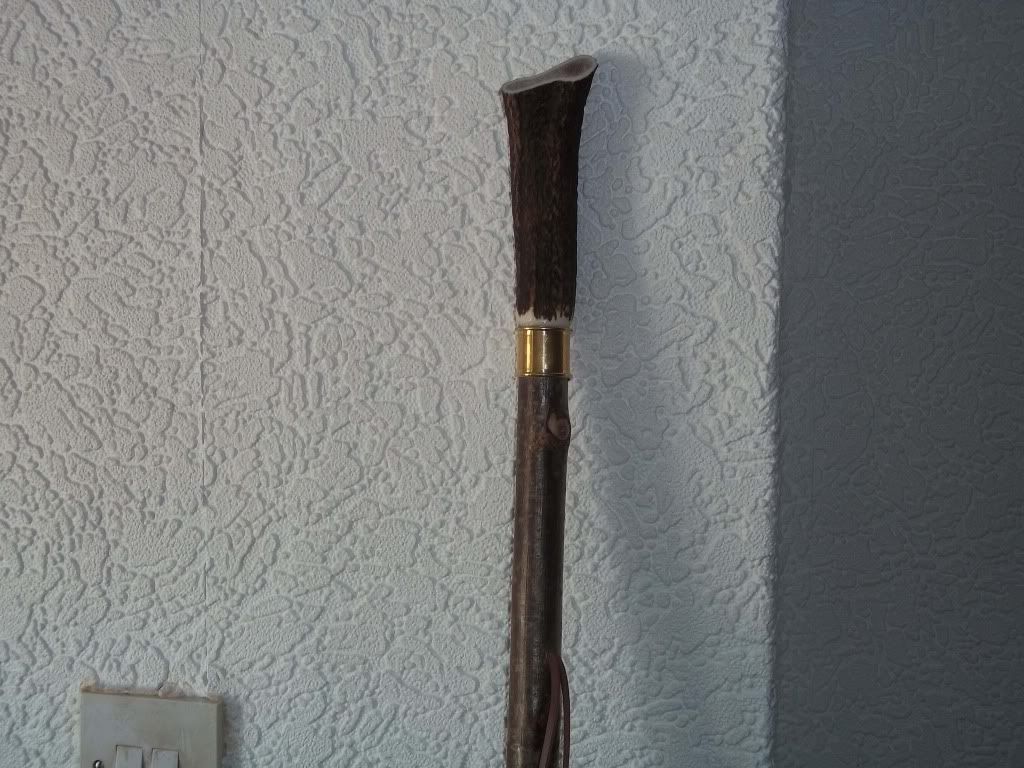
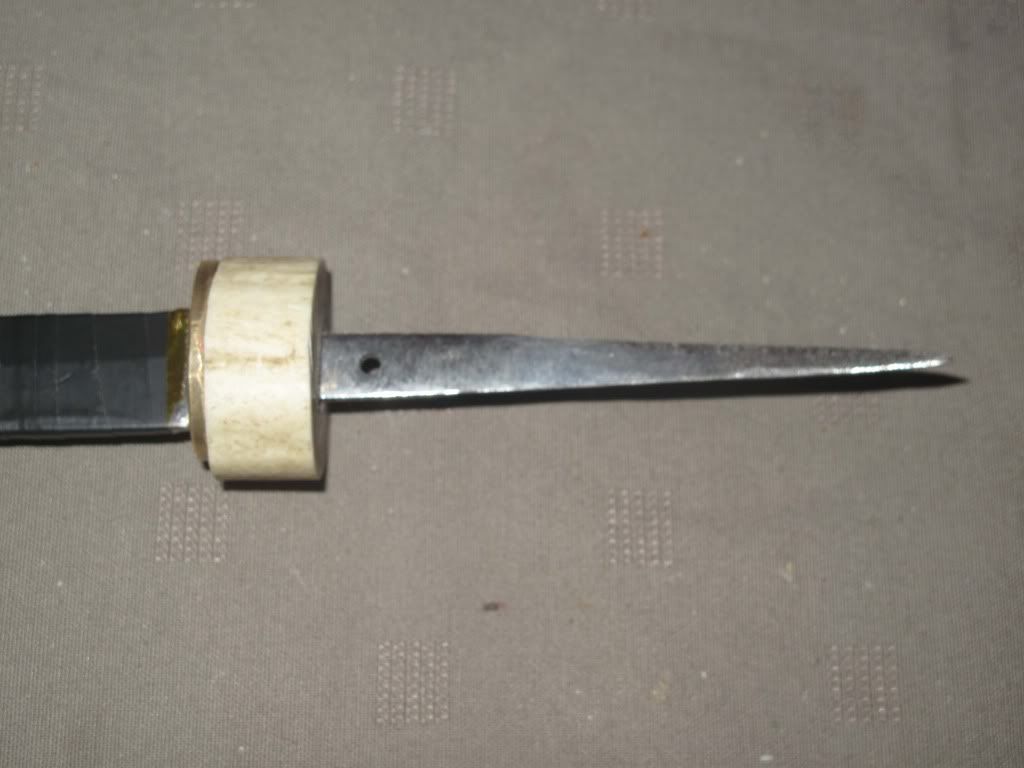
Next you need to tape up the blade, this is pretty obvious you do this to both protect you and the blade. Then mark the antler with the hole from the bolster so you know where to drill the antler. Then file the tang down all the way except 20 mm at the top near the blade so that the bolster will easily go down the tang. When the bolster gets to that 20mm that was left unfiled take a rubber mallet and tap on the bolster until it is next to the blade, this ensures a good tight fit. Then drill 3 holes where you have marked on the anler and using needle files tidy it up so it fits easily on but dont force the antler. Then what i did this is not essential but later on it makes life alot easier when it comes to fitting the tang in the wood and that was take the tang and either file it into a point or use a belt grinder.


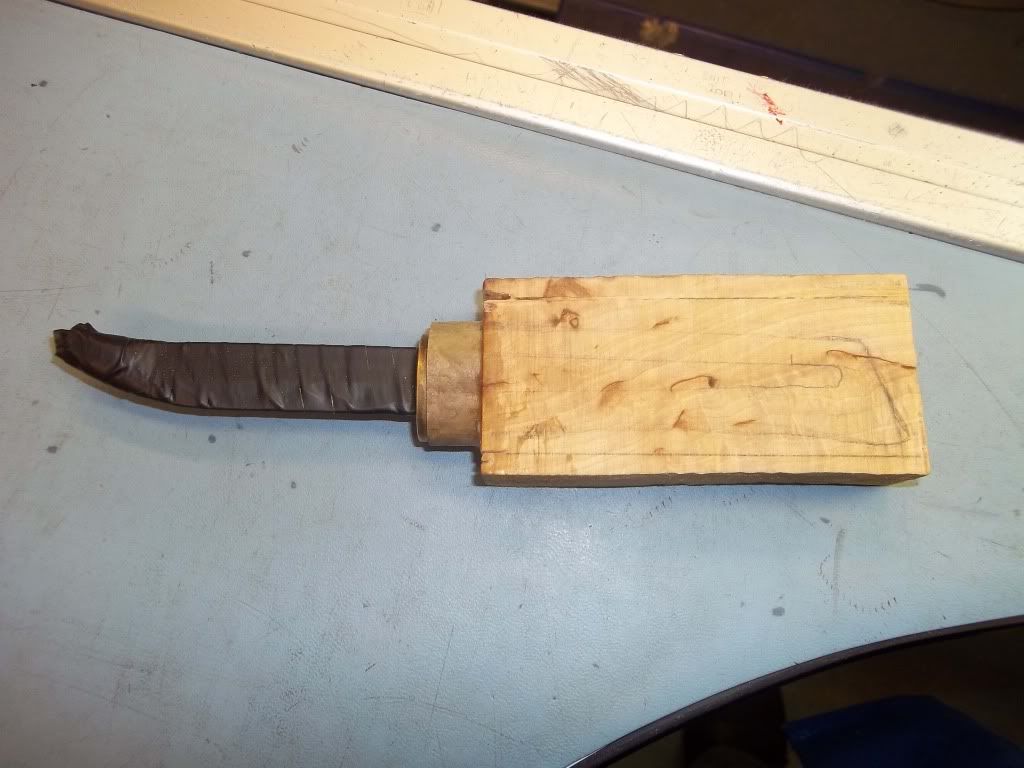
Next its time to mark out on the wood where you want the hole use the tang to mark out on the side the size of the hole needed then mark on the top of the wood and drill the holes needed. A tip i recommend is to mark the drill bit with the depth needed i made the mistake of not doing this and went too far and needed to get more wood.


Next you need to file the hole with needle files and file the tang if needed to get the knife to fit into the wood. Then mix up your araldite and get as much as possible in the hole, on the tang and between the bolster and antler then put a piece of wood on the tip of the blade and clamp in place and leave to dry for about 24 hours.


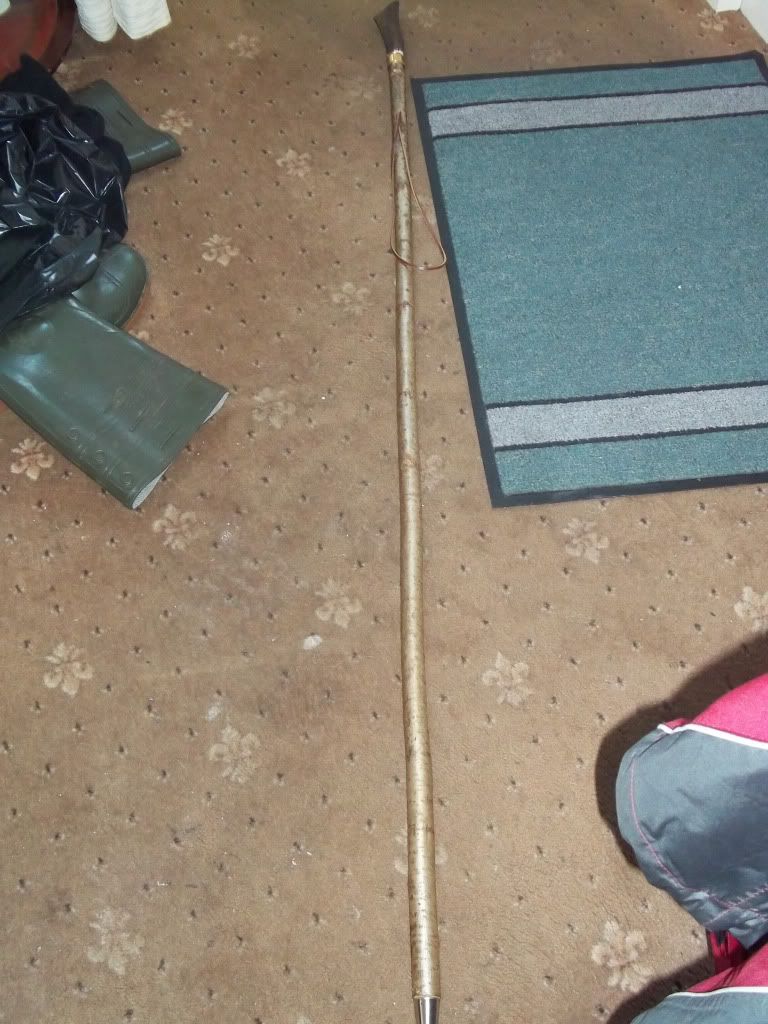
Draw a rought shape of the handle on the wood and then start to saw away as much excess as possible without cutting into where the handle will be you are just looking to get rid of some of the excess to make the filing a bit easier. Now begin to shape the handle using a rasp and a knife to whittle the smaller bits, this is a long and laborious process so dont be afraid to take a break if needed.


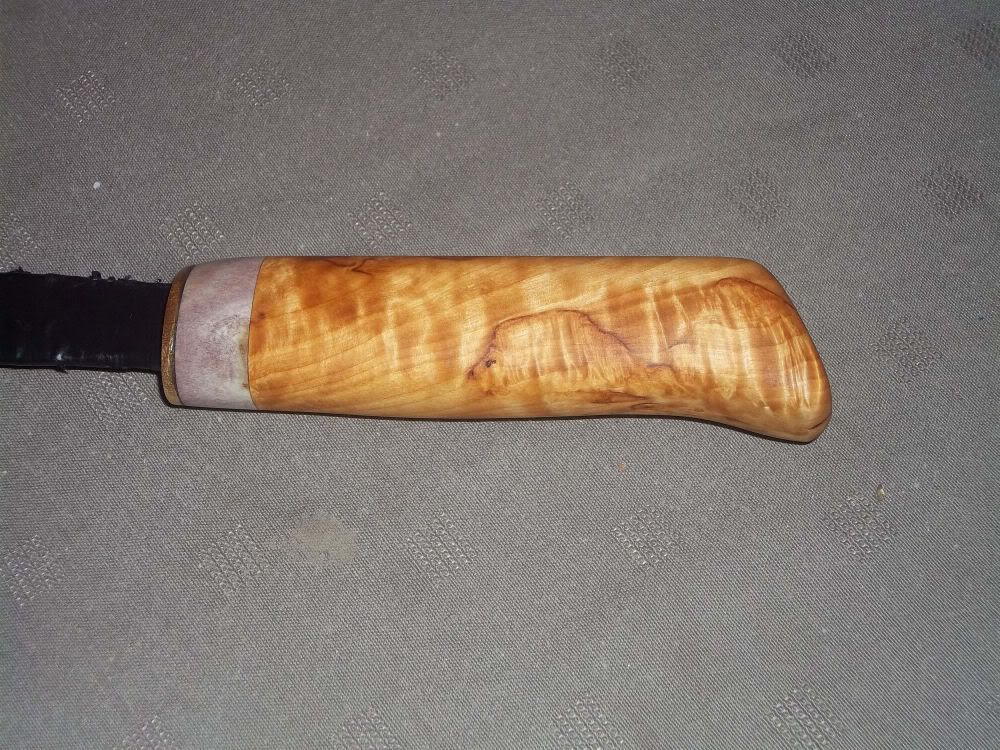
When you are happy enough with the shape of the handle its time to sand it. Its best to start off with a really course grit then down to a medium grit and a fine and then an extra fine untill its as smooth as possible. The use of an electric sander makes this job alot quicker.


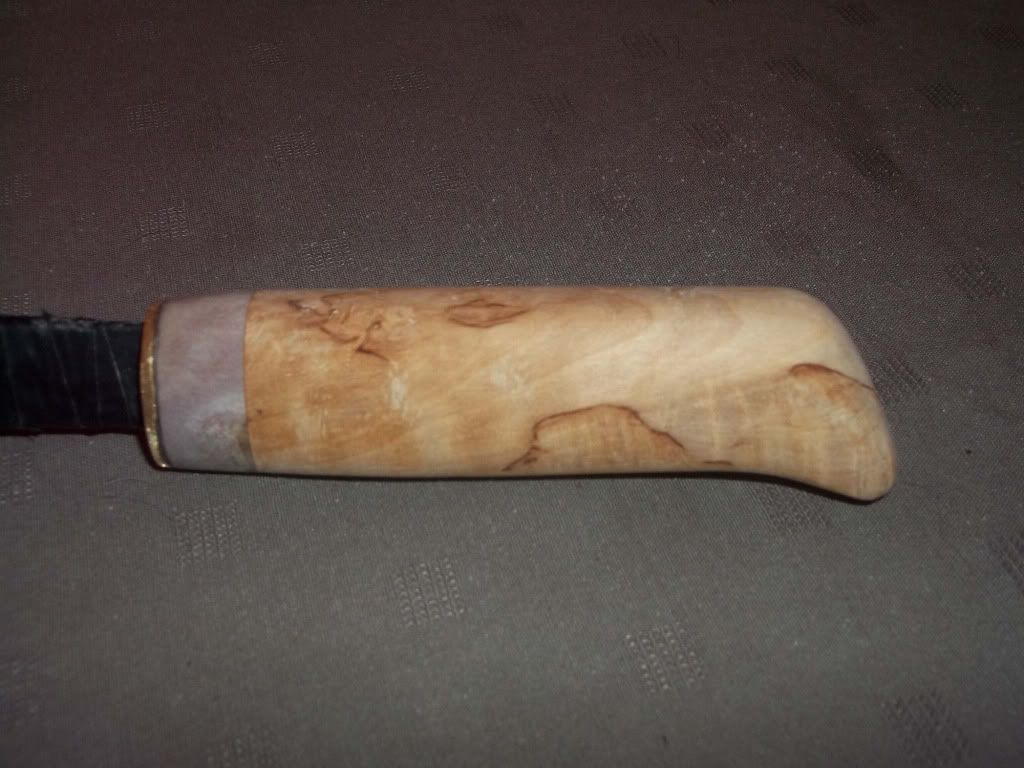
Now its time to give it a finish. I used some boiled linseed oil and the more you oil it the darker it will go. So wipe some oil on and leave for 5 mins or so and then wipe off the excess.


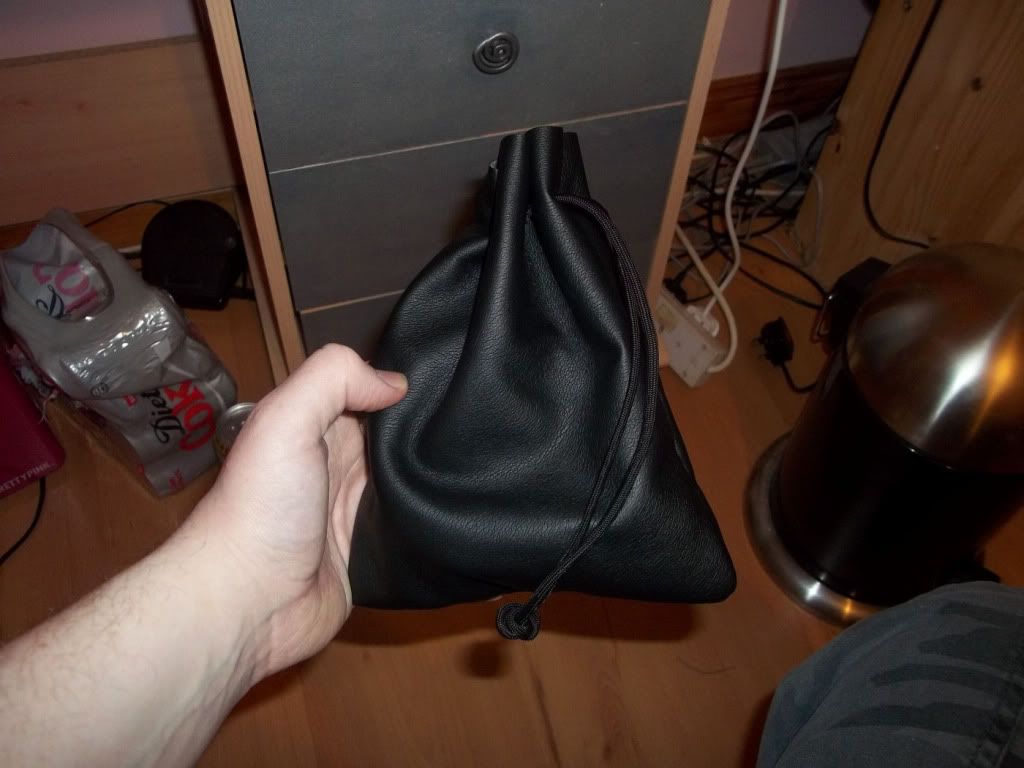
Now that we have the knife finished its time to start making the sheath. So let the leather soak in some warm water for 5 mins or so soften it enough to make it easy to work with. Make sure the blade has some tape on it to protect it from the water and put the inner sheath over the blade. Then wrap the leather around the knife and inner sheath and use some clips to hold the leather in place. Then using a fork mark out the holes that you want to pierce with your awl. Then you need to remove the knife and start to sew the sheath with a saddle stitch. Run your thread through some beeswax and tie a needle at each end of the thread. Then pierce a hole with the awl and start the first stitch, then pierce the second hole and do the second stitch and carry that process on untill the leather is sewed. (There is a good video on the saddle stitch here http://www.youtube.com/watch?v=9fHYcnrSie8)


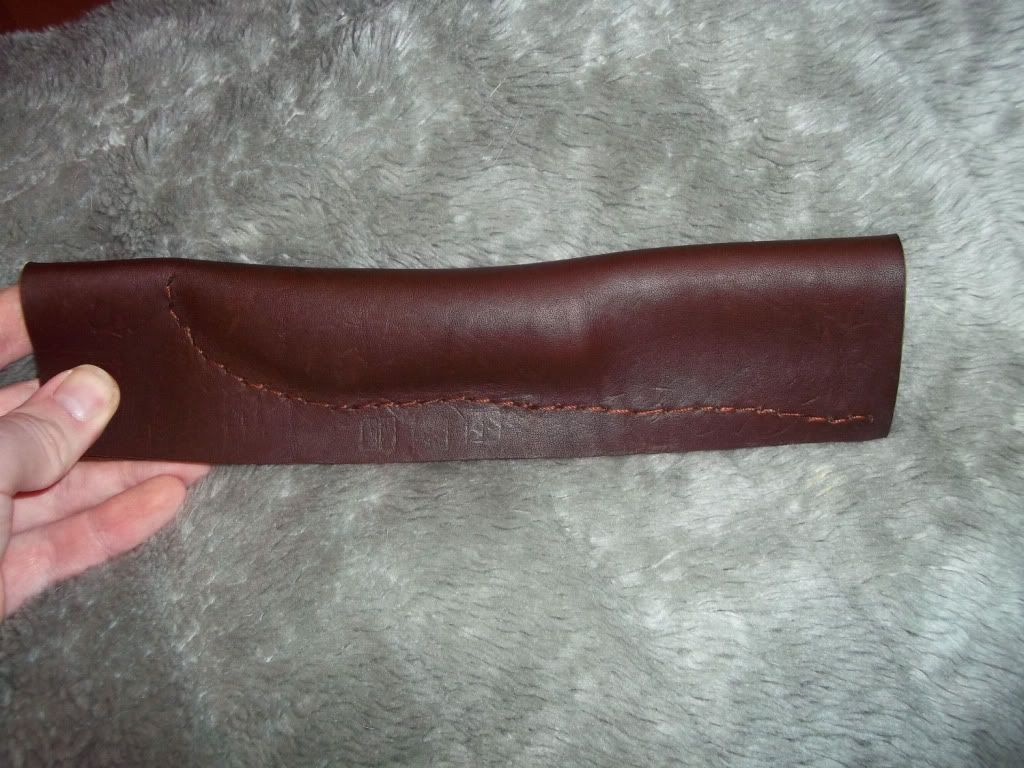
Now What you need to do is to re-soak the leather in warm water. Then place the knife in the sheath and start to mould and form the leather around the inner sheath and knife. And pierce two holes to thread you leather through either for a belt loop or as i have done with some leather thonging to make a necklace. When you are happy enough with the forming process leave the sheath in a warm place for a couple of days to dry. Hopefully the tape has kept the water off the blade but if there is any rust it comes off easy enough with some steel wool.


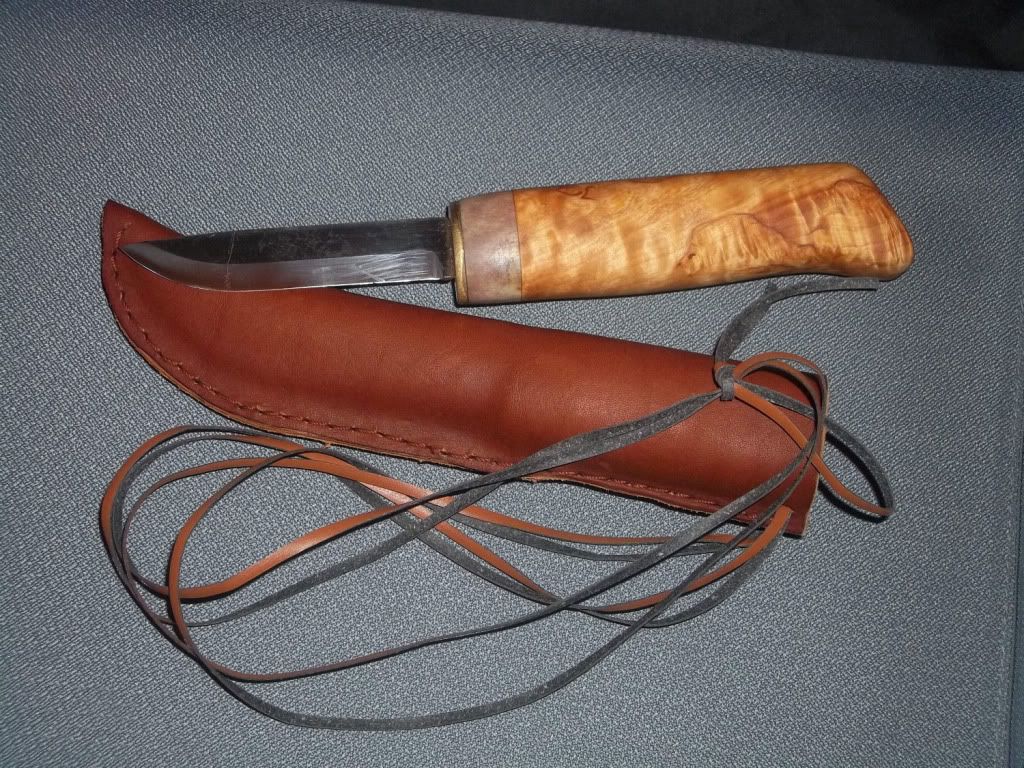
And thats the knife finished. I'm going to use this now as my main bush knife just because i'v made it myself. This process has been really rewarding and i'v learned so much. I cant wait to start on another one as there are some various things i would do differently but all in all i'm extremely happy with the knife. And making the sheath i found to be very rewarding so i think i may start and dabble in some leatherwork in the future.

Leather drawstring pouch.

I'v been wanting to make one of these for a while now and i finaly got round to doing it. Its faux leather so i thought it would be good for making my first one as its much easier to sew than real leather. This was one of the easiest things i'v done yet and was relaxing to make as i could just sit and sew with the tv on in the background and a nice cup of tea beside me made for a lazy relaxing friday night.

So what i did first was take a piece of the "leather" and fold it in half make sure its inside out of the way you want it, then i used some small but strong clamps to hold it in place. I used them to show if it was real leather however due to this being faux leather Lisa told me to use some normal pins to hold it in place and it made the sewing process so much easier. Then rougly mark out where you want to sew it. I used just a normal stitch and its holding up nicely.


If this was real leather I would mark out where i want to make the holes before sewing. You could use a fork it works just as well as the real stitch marker tool then use an awl to make the holes. When you have it all sewed cut off the excess thats not needed and turn the leather inside out again and mark out where you want the holes for your drawstring and make them either with an awl or a hole punch or whatever works best for the material you have chosen. Make sure you put an ODD number of holes on each side or the string will be inside.


Then just thread the string you are using through the holes. I used some paracord because it was just what i had to hand, however if this was real leather i would use some leather boot laces, leather cut offs or something along those lines.


And there you have a drawstring pouch. I really enjoyed making this as i also learned to sew for the first time too thanks to lisa. I'm going to take this new but simple skill and make a couple more pouches especially one to hold my hobo stove and cooking stuff. The more space i can save in my pack the better.

Saturday 5 March 2011

Walking Staff

So heres how i made my first walking staff. Now you would normally go and find a suitable stick and heat it up and bend it striaght. However you need to season the wood (let it dry out of all moisture and harden) and this takes a while, i'v read that the rule of them is a year for each inch of diametre. So i decided to go on over to http://www.thestickman.co.uk/ and bought some straight seasoned hazel and other bits and pieces needed. Keith over at stickman was more than helpful and extremely fast delivary.

So when all that arrived it was time to get started. What i ordered for mine was 1 54" hazel shank, 1 beaded brass collar and one angled antler piece and one alpine spike and 1/2 metre of leather thonging for a lanyard.

Started with tapering the ends of the stick to fit both the brass collar at the top and the alpine spike at the bottom.


Both ends are glued in place with our good friend Araldite Precision, however the alpine spike should be attached with a screw through the hole provided, but giving my lack of experience i opted just for the Araldite.


Next it was attaching the antler. It needs to be filed at the bottom in order to fit in. Then fill the collar with araldite and place the antleer in and use a small piece of electrical insulateing tape or something to hold the antler in place and leave to dry. Though make sure to not to put too much tape on that it will stick to the araldite. And for the lanyard what i did was cut the leather needed and drill a hole in the stick. Taper the ends of the leath to fit through the hole and use a pair of pliers to pull through nice and tight. Then cut off the excess and using a small piece of araldite lightly put some on just enough to wet the leather.


Next its time to finish it. Get yourself a piece of fine steel wool and some teak oil and put some teak oil on the steel wool and rub the stick down, leave for a couple of mins and then wipe off the excess. Remember to saturate ALL rags that have the oil on it in water as they are prone to combust. I would mayber use linseed oil next time to try it.


And there you have it a finished walking staff. I really enjoyed making this and can't wait to make a couple more when the wood seasons so ill do another post at that time showing how to bend the wood. This may not be the most prefessional one but it seems to do the job fine i'v took it out a few times and it has worked alot better than any shop bought walking stick i'v tried. Once again id like to give a special mention to Kieth at http://www.thestickman.co.uk/ who was extremely helpful.